Welcome to Vision 👋
Your personalized guide is ready.
Follow every step with 100% accuracy. Every step matters. Feel free to contact support ↗ if you need assistance!
Your Personalized Path
Based on your configuration, here's what you need to do:
Pre-Installation 🖥
Prepare your system before installing Vision.
Complete these steps BEFORE installing Vision. Do not skip any steps.
Completely remove any third-party antivirus software such as:
- Kaspersky
- Avast
- AVG
- McAfee
- Norton
- Bitdefender
- Any other AV software
Restart your PC after uninstalling.
Download and run Defender Control to disable Windows Defender:
Alternatively, disable it manually via Windows Security settings.
Keep Windows Defender disabled during the entire setup process. Re-enable only after completing everything.
Vision requires Visual C++ Redistributables. Download and install ALL of these:
Restart your PC after installation.
Download and install the latest DirectX End-User Runtime:
Download DirectX End-User Runtime
Run the installer and follow the prompts. Restart if prompted.
Getting Started 📋
Get your license key and download the loader.
Follow this guide to get started with Vision. Make sure you have completed the Pre-Installation steps first.
You received your license key from the Vision dashboard after purchase.
Keep your license key safe — you will need it during the setup process.
COPY & PASTE your license key. Do NOT type it manually.
Go to the Vision loader portal and register:
- Enter your username and create a password
- Redeem your license key
- Download the Loader
After redeeming your key, download the latest Loader:
Q: I don't have a license key
Purchase Vision from the official store. Contact support on Discord if you have issues.
Q: The download link doesn't work
Try copying the link into a new browser tab. Disable your VPN if it's active.
Q: My key is already redeemed
Keys can only be used once. Contact support with your purchase details.
Running the Loader 💾
Log in, activate, and start playing.
Make sure you have completed all Pre-Installation and Getting Started steps before proceeding.
- Run the Loader as Administrator
- Enter your username and password
- Paste your license key
- Click Login
Ensure your Windows clock is synced to the correct time and date before logging in.
After logging in successfully:
- Click Start or Inject in the loader
- Launch Fortnite from the Epic Games Launcher
- Wait for the game to load into the lobby or main menu
- The Vision menu will appear automatically
If the menu doesn't appear, try pressing DELETE or F4 on your keyboard.
Use one of these keys to open the Vision menu:
On your first time using Vision:
- Open the menu with DELETE/F4
- Go to Settings
- Configure your preferred options
- Spawn your preferred features
Settings are saved automatically.
Common Fixes 💥
Fix the most common loader issues.
Always make sure Windows Defender is disabled and you are running as Administrator.
If you have network-related issues:
- Disable your VPN if it's active
- Use a stable internet connection (Ethernet recommended)
- Check your firewall rules
- Try switching to Google DNS (8.8.8.8, 8.8.4.4)
Open a ticket on our Discord server for 24/7 support.
BIOS Flashing
Learn how to safely flash and backup your BIOS.
Warning: Flashing the wrong BIOS can brick your motherboard. Always verify the exact model number before downloading.
Before flashing, you need to know your exact motherboard model:
- Press Win + R, type
msinfo32, press Enter - Look for BaseBoard Product — this is your model
- Write down the full model number (e.g., ROG STRIX B550-F)
- Download the BIOS file from your manufacturer's website
Always backup your current BIOS before flashing:
- Enter BIOS setup (F2 or Del during boot)
- Look for Tool or ASUS BIOS Flashback
- Select Save Profile or Backup
- Save to a USB drive (FAT32 formatted)
- Keep this backup in a safe place
Method 1: From within BIOS (Recommended)
- Copy the downloaded BIOS file (.Cap or .rom) to a FAT32 USB drive
- Rename it to BOSS.CAP (some boards)
- Insert USB, enter BIOS
- Navigate to Tool → ASUS BIOS Flashback
- Select the file and press Enter
- Wait for the process to complete (do NOT power off)
Method 2: Using BIOS Flash Utility
- Download the flash utility from your motherboard manufacturer's site
- Run as Administrator
- Load the BIOS file
- Click Flash and wait
- System will restart automatically
Never: Power off during flash, use a corrupted file, or flash a BIOS meant for a different model.
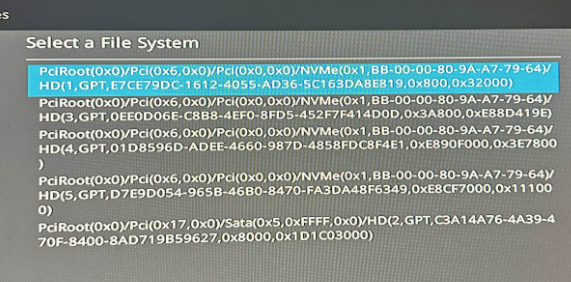
Windows Reinstall
There are 2 reinstallation methods. Choose which one is best for you.
Most drives cost $5, and it's recommended to get one.
Otherwise: Reinstall Windows by settings > remove everything > Cloud download > Change settings > Clean data [YES] / Delete files from all drives [YES] / Download Windows [YES] > Confirm & next and wait.
Post Reinstall 🖥
Set up Windows correctly after reinstall.
Follow these steps carefully to ensure a clean Windows installation.
- During Windows setup, DO NOT connect to Wi-Fi
- Use Skip or Local Account when asked for Microsoft account
- Use a strong local account name and password
- Choose Privacy settings as you prefer
- Install all Windows Updates after setup
After Windows boots for the first time:
- Open Settings → Windows Update and install all updates
- Restart when prompted
- Install your network drivers (Ethernet first, then Wi-Fi if needed)
- Go to BIOS and configure as per the BIOS Config tab
Install the necessary drivers in this order:
- Chipset drivers (from motherboard manufacturer website)
- GPU drivers (NVIDIA/AMD/Intel)
- Audio drivers (usually auto-installed via Windows Update)
- Other hardware drivers as needed
BIOS Configurations
Go to BIOS & follow the steps.
How to Easily Boot into BIOS (YouTube)
Disable TPM in BIOS
For a successful permanent spoof, TPM must be disabled in BIOS to prevent anti-cheats from reading your hardware serials through the TPM module.
INTEL 00:00 & AMD 01:20
Navigate to Advanced → Security → TPM and disable it.
Navigate to Settings → Security → TPM and disable it.
Navigate to TPM Settings → Disabled.
Run in PowerShell as Administrator:
Disable-TpmAutoProvisioning
Clear-Tpm
Turn Off Wi-Fi & Bluetooth | Required
Go to Advanced → Onboard Devices and disable Wi-Fi & Bluetooth.
Download Vision
Get the latest version of the Vision Permanent Loader.
Use the cleaner to remove all traces of the Vision Loader from your system so anti-cheats cannot detect it was ever installed — use after all spoofing completed (optional)
Download CleanerClick the download button above to get the latest version.
Ensure all other applications are closed and that the anti-virus is disabled.
Run Vision Permanent Loader as administrator.
COPY & PASTE LICENSE KEY! DO NOT TYPE IT MANUALLY.
Ensure your WINDOWS CLOCK/TIME IS SYNCED!
Disable Defender 🛡
Turn off Windows Defender completely.
Windows Defender MUST be completely disabled before running the Vision spoofer. Do not skip this step.
Download and run Defender Control to disable Windows Defender with one click:
- Run as Administrator
- Click D to disable Windows Defender
- Make sure it shows Disabled
If Windows Defender turns back on automatically, keep running Defender Control to disable it again.
Disable Updates 🚫
Stop Windows Updates from running.
Windows Updates can interfere with the spoof and re-enable protections. MUST be disabled before spoofing.
- Press Win + R, type
services.mscand press Enter - Find Windows Update
- Right-click → Properties
- Set Startup type to Disabled
- Click Stop under Service status
- Click Apply and OK
Also disable Update Orchestrator Service and Background Intelligent Transfer Service the same way.
Add these entries to your hosts file to block Windows Update servers:
127.0.0.1 update.microsoft.com
127.0.0.1 www.update.microsoft.com
127.0.0.1 mp.microsoft.com
Open Notepad as Administrator and edit C:\Windows\System32\drivers\etc\hosts
Permanent Spoof 💻
Run the permanent spoofing process.
Make sure you have completed BIOS Configuration, disabled Defender, and disabled Windows Updates before proceeding.
Download the Vision permanent spoofer:
Disable your VPN before running the spoofer.
Before running the spoofer:
- Restart your PC
- Press DELETE, F2, or F10 (varies by motherboard) to enter BIOS
- Check your BIOS Config tab for required settings
- Boot into Windows
- Make sure Windows Defender is disabled
- Run the Vision Spooler as Administrator
- Follow the on-screen instructions
- Wait for the spoof to complete
Do NOT restart or turn off your PC until the process is complete.
Post Spoofing 🔒
Steps to take after completing the spoof.
Great job! Follow these final steps to ensure everything is working correctly.
If you disabled Secure Boot in BIOS:
- Go back into BIOS
- Navigate to Boot settings
- Enable Secure Boot
- Save and exit BIOS
Now download the Vision Loader to start using your spoof:
Redeem your license key and start playing!
Network Unflagging 🌐
Disable hidden network adapters and change network serials.
Network adapters can leave traces. Follow these steps carefully.
- Open Device Manager (
devmgmt.msc) - Click View → Show hidden devices
- Look for greyed-out network adapters under Network Adapters
- Right-click each hidden adapter → Uninstall
MAC Not Changing 🔍
Fix MAC address issues.
If your MAC address isn't changing, follow these troubleshooting steps.
There are several reasons your MAC address may not be spoofing:
- Wi-Fi adapter doesn't support MAC spoofing
- Network adapter drivers need updating
- Some adapters have hardware-level MAC locking
- Virtual adapters are interfering
The most reliable fix for MAC spoofing issues:
- Go into BIOS
- Find Wi-Fi and Bluetooth settings
- Set both to Disabled
- Save and exit BIOS
- Use only Ethernet for your network connection
If the above methods don't work:
- Open the Loader
- Go to the Miscellaneous tab
- Enable FALLBACK MAC SPOOFER
- Start the spoof again
Usage of VPN
Use a VPN on supported games to prevent network bans.
Required for Fortnite (for one week), Rust (permanently until router reset or new IP), and games with server admins like EFT. Other EAC/BE games may not strictly require a VPN, but using one for the first week is recommended. For casual protection, Windscribe offers 10GB free.
Recommended VPNs


THESE WILL NOT WORK — you need one of the VPNs we list.
Secure Boot Violation 🔐
Fix EFI secure boot errors.
If you see a "Secure Boot Violation" blue screen, follow these steps.
- Restart your PC
- Enter BIOS (press DELETE or F2 during boot)
- Go to Boot settings
- Find Secure Boot and set it to Disabled
- Save and exit BIOS
Disabling Secure Boot is required for the Vision spoofer to work. You can re-enable it after spoofing.
How to RAID0 💽
Set up RAID0 for maximum spoofing protection.
RAID0 (striping) combines two or more drives into one logical drive. This provides the strongest spoofing protection by making your disk serials harder to trace.
Before setting up RAID0:
- You need at least 2 identical drives (same size/brand preferred)
- All data on these drives WILL BE ERASED
- Your motherboard must support Intel RST or AMD RAID
- You need a USB drive for Windows installation
Intel Systems:
- Enter BIOS
- Go to PCH Storage Configuration
- Set SATA Mode Selection to Intel RST Premium
- Save and exit
AMD Systems:
- Enter BIOS
- Find SATA Mode or Storage Configuration
- Set to RAID mode
- Save and exit
Temp Requirements ℹ
Check if your system meets the requirements.
Temp is a quick way to use Vision without a full reinstall. Make sure your system meets the requirements.
To use Vision Temp, your system must meet these requirements:
- Windows 10 or Windows 11
- 8GB RAM minimum (16GB recommended)
- TPM 2.0 must be enabled in BIOS
- VT-d must be enabled in BIOS
- Administrator access on your PC
- Press Win + R, type
tpm.msc - Check if TPM shows as Ready and version is 2.0
- If TPM is not ready, enable it in BIOS
To verify VT-d is enabled:
- Restart your PC and enter BIOS
- Look for VT-d, Intel VT for Directed I/O, or AMD-Vi
- Make sure it's set to Enabled
VT-d Setup 🖥
Enable virtualization for Temp to work.
VT-d (Intel) or AMD-Vi (AMD) MUST be enabled for Temp to function.
Intel Systems:
- Restart and press DELETE or F2 to enter BIOS
- Go to Advanced → CPU Configuration
- Find Intel VT for Directed I/O (VT-d)
- Set to Enabled
- Save and exit BIOS
AMD Systems:
- Restart and press DELETE or F2 to enter BIOS
- Go to Advanced → CPU Configuration
- Find AMD-Vi or IOMMU
- Set to Enabled
- Save and exit BIOS
After enabling VT-d:
- Boot into Windows
- Press Win + R, type
msinfo32 - Look for Hypervisor → Should show Yes
Disable Defender 🛡
Turn off Windows Defender before setup.
Windows Defender MUST be disabled before running Vision Temp.
Download and run Defender Control to disable Defender instantly:
- Run as Administrator
- Press D to disable Windows Defender
- Verify it shows Disabled
Install Runtimes 📦
Install Visual C++ and .NET runtimes.
Vision Temp requires Visual C++ Redistributables to be installed.
Download and install both x86 and x64 versions:
Install all four, restarting after each if prompted.
Install DirectX 🎮
Install the latest DirectX runtime.
DirectX is required for Fortnite and Vision to render correctly.
Download the latest DirectX End-User Runtime from Microsoft:
Download DirectX End-User Runtime
Run the installer and follow the on-screen prompts. Restart if prompted.
Secure Boot Check 🔐
Verify or disable Secure Boot.
Secure Boot may interfere with Temp. Check your current status.
- Press Win + R, type
msinfo32 - Find Secure Boot State
- If it shows Off, you're good to go
- If it shows On, you may need to disable it
- Restart PC and enter BIOS
- Go to Boot settings
- Find Secure Boot
- Set to Disabled
- Save and exit
Temp Spoofing 💻
Run the Vision Temp spoof.
Make sure VT-d is enabled, Defender is disabled, and runtimes are installed.
Download the Temp loader from the loader portal:
- Run the Temp loader as Administrator
- Enter your license key
- Click Start
- Wait for the initialization to complete
Do NOT close the loader while it's running. Keep it open in the background.
Tip: If you get banned, clean the system first, then restart the loader and spoof. Make sure all serials are green before playing — if any are red, submit a ticket.
Close the loader and play your favorite game without any issues. Make sure all serials show green before playing — if any are red, submit a support ticket before playing.
HWID Error 🔍
Fix HWID mismatch issues.
This error occurs when your hardware ID has changed or does not match your license.
HWID (Hardware ID) changes when:
- You upgraded major hardware (motherboard, CPU, GPU)
- You reinstalled Windows
- Your HDD/SSD was changed or reformatted
- BIOS settings were reset
- Open a ticket on our Discord server
- Provide your HWID and license key
- Explain the situation
- Our team will update your license
Free HWID resets are available once per license. Additional resets may require a small fee.
BSOD Fixes 🗳
Fix Blue Screen of Death errors.
Blue Screen errors can indicate driver conflicts or hardware issues.
This error is usually caused by:
- Outdated or incompatible drivers
- RAM issues
- Overclocked settings
Fix: Update your GPU drivers, disable overclocking, or run Windows Memory Diagnostic.
This error occurs when Windows detects a problematic driver:
- Boot into Safe Mode
- Open Command Prompt as Administrator
- Run:
verifier /reset - Restart your PC
Usually a driver conflict:
- Update all drivers (especially GPU and chipset)
- Check for Windows Updates
- Try DDU (Display Driver Uninstaller) to completely remove old GPU drivers
- Reinstall the latest GPU drivers
Loader Issues 🐛
Fix common loader problems.
These are the most frequently reported loader problems and their solutions.
- Make sure you are running as Administrator
- Check that Windows Defender is disabled
- Verify your VC++ runtimes are installed
- Try running in Windows 7 compatibility mode
- Check your internet connection
- Disable your VPN
- Restart the loader
- Restart your PC and try again
- Close all other applications
- Make sure Fortnite is completely closed
- Run loader as Administrator
- Try clicking Inject again
Restart Issues 🔁
Fix problems with PC restarts.
If your PC gets stuck on restart, try these solutions.
- Hold the power button for 5 seconds to force shut down
- Wait 10 seconds
- Power back on
- If it keeps getting stuck, enter BIOS and reset to default settings
If restart issues persist:
- Enter BIOS during startup
- Look for Load Default Settings or Reset to Optimized Defaults
- Save and exit
- Try restarting normally
Update Issues 📰
Fix Windows Update problems.
Windows Updates can interfere with Vision. Keep updates disabled while using Vision.
- Open Services (Win + R, services.msc)
- Find Windows Update
- Set Startup type to Disabled
- Stop the service
- Also disable Update Orchestrator Service
Common Windows Update error:
- Run Command Prompt as Administrator
- Type:
sfc /scannow - Press Enter and wait for completion
- Type:
DISM /Online /Cleanup-Image /RestoreHealth - Restart and try updates again
Windows Activation
Activate Windows for free.
Your Windows is already activated. No action needed.
Open PowerShell as Administrator
Press Win + X and select Windows PowerShell (Admin).
Run the Activation Script
Menu Navigation
Press 4 → 1 → 5
(Select method → Activate → Enable auto-renewal)
Verify
Run slmgr /xpr to verify activation.
TPM Spoofing
Information about TPM spoofing for Temp.
Temp requires TPM 2.0 to be enabled. If TPM is disabled, you may need to enable it in BIOS.
- Press Win + R, type
tpm.msc - Check if TPM shows as Ready and version is 2.0
- If TPM is not ready, enable it in BIOS
Intel Systems:
- BIOS → Advanced → PCH Configuration
- Set Intel PTT to Enabled
- Save and exit
AMD Systems:
- BIOS → Advanced → CPU Configuration
- Set AMD PSP fTPM to Enabled
- Save and exit